DIY Burlap Bunting
/The holidays are upon us so I thought it would be fun to share some of my Thanksgiving decorations with you. I made a little burlap bunting that was so easy I wanted to share it as a DIY. This project is fun, inexpensive, and turns out super cute!
Supplies I Used:
Chocolate Brown Burlap
Twine/Jute
Scissors
Triangle Template
Hot Glue Gun & Hot Glue
Gold Paint
Paint Brush
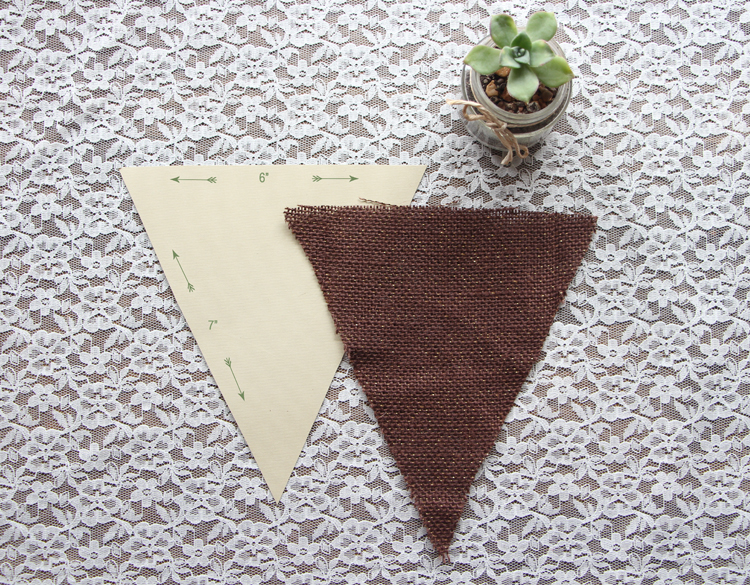
1. I started out by deciding how long I wanted to make my bunting. The one I made is about 73" long. Next I made my template for the triangles out of some scrap paper. The triangles are 6" along the top and 7" down the sides.
2. Cut out the number of triangles you need. I decided to hand paint the words "Give Thanks" on mine, so I needed 10 triangles total.
3. Get your paint and paint brush ready and start painting! If you don't like painting free hand you can use a stencil.
4. Now that you have finished the lettering you can start gluing. Start by making about a 3ft. tail. Flip your triangle upside down as pictured below and add glue to 3 spots. Place your twine on the glue spots. Now keep adding your triangles one by one until you get to the end. Remember to turn each one upside down to glue it and leave about a 1/2" space in between the triangles.
5. You are basically done! This is what the triangles will look like once they are glued to the twine.
6. I tied little lace scraps on the end of mine for added cuteness! Here is the finished product! I hope you enjoy making yours!
We would love to hear from you! Leave a comment below or find me on Instagram under @kristamares or @needlesandleaves.


Comments (0)